What can I bring?

It’s the beginning/end of summer. You’re invited to a cookout/picnic/friendly get together. You are asked to bring something to share. Panic. You think. Rallying cry of…

WHAT CAN I BRING??

I’m here to allay any fears, dear readers. Today I am sharing 3 different appetizers sure to make you look like a rockstar among your friends and family.

Why do people panic at the thought of cooking for a large group of people? I admit, it can be a bit overwhelming, considering there are diet restrictions, gluten allergies, “Mary doesn’t eat that…” etal. It’s enough to fall back on the usual suspects. Pasta salad. Potato salad. A bag of chips.

But instead of panicking, why not lean into this a bit and take a leap of faith by trying something new? I know that for myself, that was my mindset when I began to seriously cook and try new recipes. A lot of the time I would go to a restaurant and find something that I absolutely fell in love with, and would then go home and try to replicate that recipe. Many times I failed, but some times the failure was better than the original. And sometimes it wasn’t. But isn’t that the “Joy of Cooking?”

For me, it brings utter joy to try different combinations of ingredients, seeking to elevate what some would consider a basic recipe. And trust me, my family has born witness to these “failures” with unmitigated joy! Except for that time I auditioned for “Master Chef” and I made them eat 9 types of gnocchi with the same sauce until I was able to nail the recipe. Unfortunately, I didn’t make the cut for the show, but it taught me a valuable lesson. Perseverance and practice makes all of your recipes taste better. That and a whole bunch of love thrown in!

Today i am sharing my take on bruschetta served with a whipped ricotta, Kousa Ganoush and Italian Roasted Garlic and White Bean dip. The Kousa Ganoush is in honor of my two besties, Shari and Becky, who aren’t huge fans of eggplant.

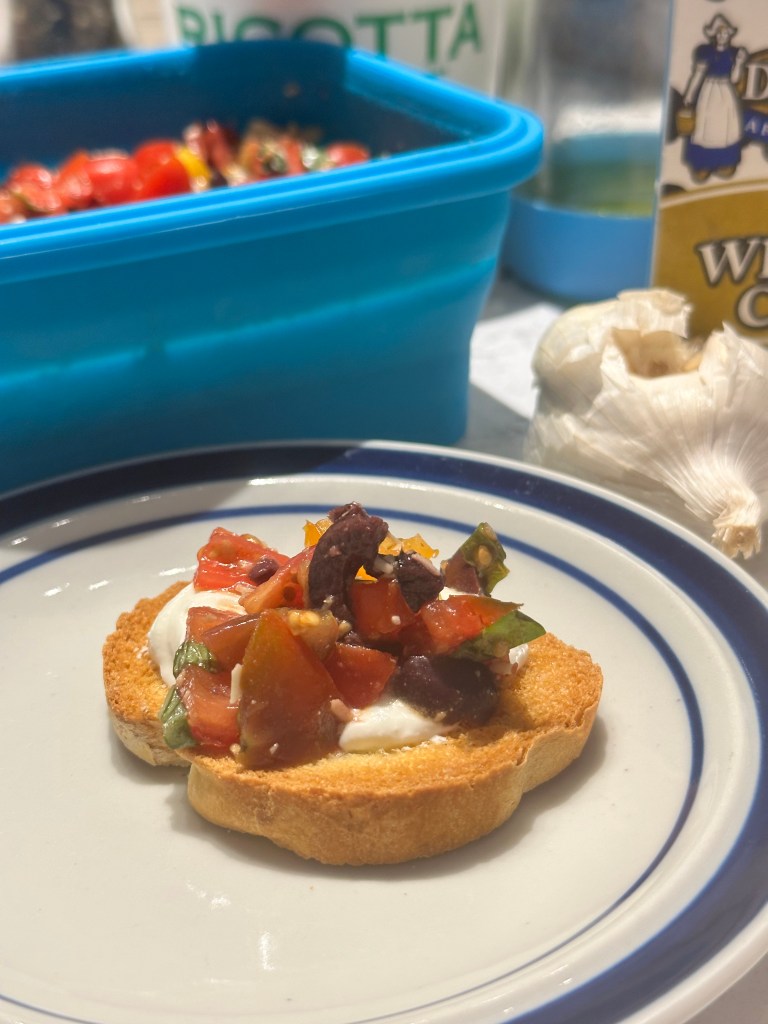
First up, the Bruschetta

Bruschetta with Whipped Ricotta

  • 1 – 2 pints of cherry tomatoes
  • 1 Clover Garlic, chopped finely
  • 1/2 cup of Basil, cut into chiffinade
  • 1/4 cup shaved Parmesan
  • 1 cup of Kalamata olives, chopped
  • 3 Tbsp Balsamic Vinegar
  • 3 Tbsp EVOO
  • Salt and Pepper to Taste

For the Whipped Ricotta:

  • 15 oz Whole Fat Ricotta
  • 1 cup heavy Whipping Cream
  • 1/4 cup EVOO
  • Salt and Pepper to taste

Prepping the Brushcetta:

Dice the tomatoes, olives, and garlic. Add to a large bowl.. Stir in the parmesan cheese, the EVOO and the Balsamic. Add the Basil, salt and pepper to taste and mix gently. Set aside.

In a cold bowl, whip the heavy cream until stiff peaks form. In a separate cold bowl, whip the ricotta until it starts to slightly thicken. Fold in the EVOO and mix. Add the whipped cream to the ricotta and gently blend until nice and thick. Add Salt and Pepper to taste.

Serve this on toasted bread, layering the ricotta directly on the bread and topping with the bruschetta.

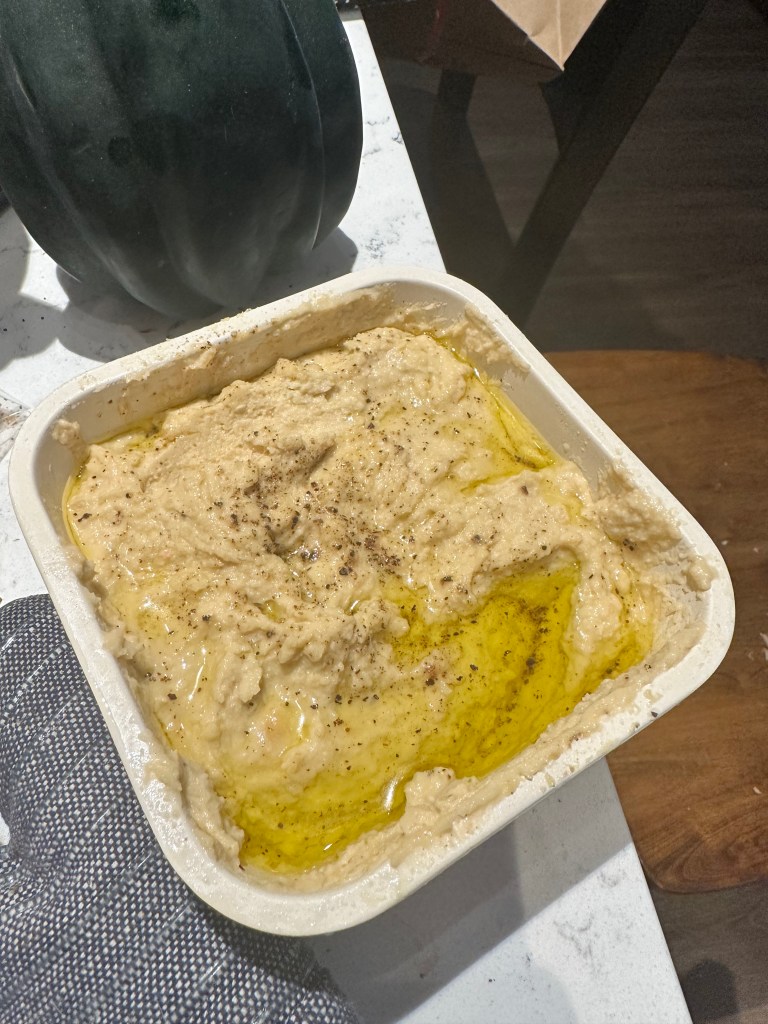
Roasted Garlic and Italian White Bean Spread

  • 15 oz can of Cannelonni beans, drained
  • 15 oz can of Garbanzo beans, drained
  • 1 whole head of garlic
  • 1/4 – 1/2 cup EVOO
  • Salt and Pepper to taste

Prepping the dip:

Preheat the oven to 400. Slice the top of the head of garlic off exposing some of the cloves. Place in a piece of foil and drizzle with olive oil. Seal the foil up and place in the oven to roast for at least 40 minutes. Once done, put to the side to cool.

In a food processor, add both cans of beans and 1/4 EVOO, plus salt and pepper. Pulse to blend. Add the roasted garlic to the mixture by squeezing the cloves. Blend again, adjusting the seasoning to your taste. Add additional olive oil if the mixture is too dense. Don’t worry if all of the Garbanzo beans don’t smash entirely, this will give the dip a little more of a rustic look to it. Place in a container and drizzle with additional EVOO plus pepper and just a hint of salts. Serve with pita chips, fresh bread, or whatever cracker you like. You can even use this as a topping for sandwiches.

Kousa Ganoush (Zucchini Dip)

  • 4 large Zucchinis, split lenght wise
  • 1-2 Cloves of Garlic, chopped
  • 2 Tbsp Plain Greek Yogurt
  • Juice of 1/2 a lemon
  • 2 Tbsp Tahini
  • 1 tsp Cumin
  • 1 tsp Sumac (optional)
  • 1/4 – 1/2 EVOO
  • Salt and Pepper to taste
  • 1/4 cup chopped pistachios

Prepping the Kousa Ganoush:

Preheat your oven to 400. On a baking tray lined with foil or parchment, place the sliced zucchini cut side up. Drizzle with EVOO and bake util the flesh is tender and it starts to turn a golden color. Remove from the oven and cool.

In a food processor, add the yogurt, tahini, lemon juice, cumin, sumac (if using) and garlic. Pulse a few times to blend. Once the zucchini has cooled, scoop out the flesh into the food processor and pulse about 5 times to blend. Add 1/4 cup of EVOO and pulse again. Do not overblend, and. the dip will start to get too thin. Taste and add Salt and Pepper to your preference.

Pour out the dip into a container and top with additional EVOO, a sprinkle of additional Sumac, and the chopped pistachios. Serve with pita chips.

Let me know what you think of these recipes and drop me a note if you have any additional recipes you’d like to see.

Buon Appetito!

Dog Days of Summer

Howdy folks! Apologize for my long absence. We of course had that nasty “COVID” thing, and then I had a series of jobs, etc. I find myself at the end of summer with no gig, and a whole helluva lot of time on my hands. So, back to the grind, er BLOG I go. Miss me??

Today I thought I’d share with you my fool proof, go-to Ribs recipe courtesy of someone from a lifetime ago. I always thought there were only 2 ways to do ribs – boil first on the stove (a la my moms way) and then baked with a lot of Open Pit on them. Which always led to overly chewy ribs with burnt spots (sorry mom). Or, grill directly on a charcoal or gas grill for a while, slathering them in (your BBQ sauce here) sauce and winding up with, again, chewy either UNDER-done or OVER-done ribs. Yuck to both.

Fear not, dear reader, I have TWO, count ‘em, TWO recipes for picture perfect ribs. The first is the standard “3-2-1” method, cooked in a smoker or on indirect heat on either a gas or charcoal grill. The object here is to prep the ribs as described below, and then smoke/cook for 3 hours at 275. After the 3 hours, you’ll remove the ribs, wrap them in foil and add your liquid of choice (beer, apple cider vinegar, whatever) and seal tight. Put those back on the grill/in the smoker for 2 more hours. For the final hour, remove the ribs, slather in sauce and place back on the grill/in the smoker for about an hour more, or until they are done to your liking. This is a pretty much fool proof way to go, but if you’re like me and don’t have 6 hours to tend to the ribs, the second way is more hand’s off and yields just as good if not better of a product.

For the second, easier method, we are going to sort of braise our ribs first in the oven with liquid and aromatics to get that fall of the bone, tender meat. Once that’s been accomplished, we simply finish the ribs on a grill with your favorite sauce. And since I no longer think of O—- P— as a real BBQ sauce, I will also share my go-to Carolina sauce. 5 ingredients, 30 minutes. Delish!

So, without further ado let’s jump into this.

For the Ribs

  • *1.5lbs of Spare Ribs, Baby back, or whatever you want
  • 1 apple, quartered
  • 2 stalks of celery
  • 1-2 onions, quartered
  • 1 cup apple cider vinegar OR beer plus 1 cup water
  • 1 tsp Liquid Smoke
  • Your favorite Rib Rub (I recommend a smokey sweet blend)

For the Carolina Gold Sauce

  • 1/2 Onion, grated
  • 4 TBSP Butter
  • 1/2 Cup Yellow Mustard
  • 1/2 Cup Apple Cider Vinegar
  • 1/2 Cup Packed Brown Sugar
  • 1-2 bayleaves
  • OPTIONAL: 1 tsp Dry Mustard
  • OPTIONAL: 1/8 tsp Cayenne, to taste
  • Salt and Pepper

Prepping the Ribs:

Take your ribs out of the packaging and flip over to the bone side. Take a sharp paring knife and slit the back of the ribs, peeling back the silver skin. It will be a bit slippery and hard to remove, so have a few papertowels handy to help your grip.

Once the silver skin has been removed, Cut your ribs into manageable pieces. Remember, the ribs are going to have to fit into a baking dish in the oven. Coat both sides of the ribs with the rub and set aside

Place the apple, onions, celery, apple cider vinegar or beer and water into a large baking pan. Add a few dashes of the liquid smoke and place the ribs on top of everything, doing your best not to submerge the ribs in the liquid. Cover tightly with foll and place in a preheated 275 degree oven for approximatley 3 hours. Remember, you are braising and need to go low and slow.

After 3 hours, remove the baking pan out of the oven and let cool for at least 1/2 hour before you remove the foil. Be careful!! That steam is going to be hot!!

Meanwhile, while the ribs are doing their thing in the oven, we can make the sauce.

Carolina Gold Sauce:

Take your 1/2 onion and grate on a box grater. Try to reserve that onion juice!

In a pan, melt the butter and add the onions, stirring until the onions get soft, NOT brown. About 5-7 minutes. Add the sugar, the mustard, the apple cider vinegar and the bay leaf. Stir to combine and let simmer on the stove for approximately 30 minutes, stirring every once in a while and making sure the mixture is not boiling.

During the last 10 or so minutes, add the dried mustard, the cayenne (if using both), and stir. Taste to see if the mixture needs salt and pepper and add accordingly.

Continue. to simmer the sauce until it thickens and the flavors blend. You can go as long as 90 minutes, if you’re so inclined, or stop at 30 minutes.

Have a bottle or jar ready and strain the sauce through a fine mesh strainer to remove all of the onion and other ingredients. Let sit until it comes to room temperature. and either use immediately, or refrigerate. The sauce will keep about a week in the fridge. If you don’t eat it all first!

Once the sauce and the ribs are prepped, we go to the final, finishing step. Set your outdoor grill, gas or charcoal, as close to 375-400 as you can. Place the ribs bone side down and cook for about 15 minutes. Flip the ribs, and slather sauce on the bone side. Cook for another 15 minutes, turning the ribs over again and slathering the “meat” side with the sauce. Cook for 15 minutes more. I usually do the sauce, cook, flip, etc about 2-3 times, giving the ribs a nice carmelized sauce layer and giving the ribs a little a little extra char.

When you are satisfied with the color, temp and sauce level, remove the ribs to a serving platter. Give yourselves about 10 minutes to let the ribs cool below scalding before you dig in. I hope you enjoy this recipe! Give me a shout if you try it and like it!

*you can use as many pounds of ribs you’d like.

Buon Appetito!